
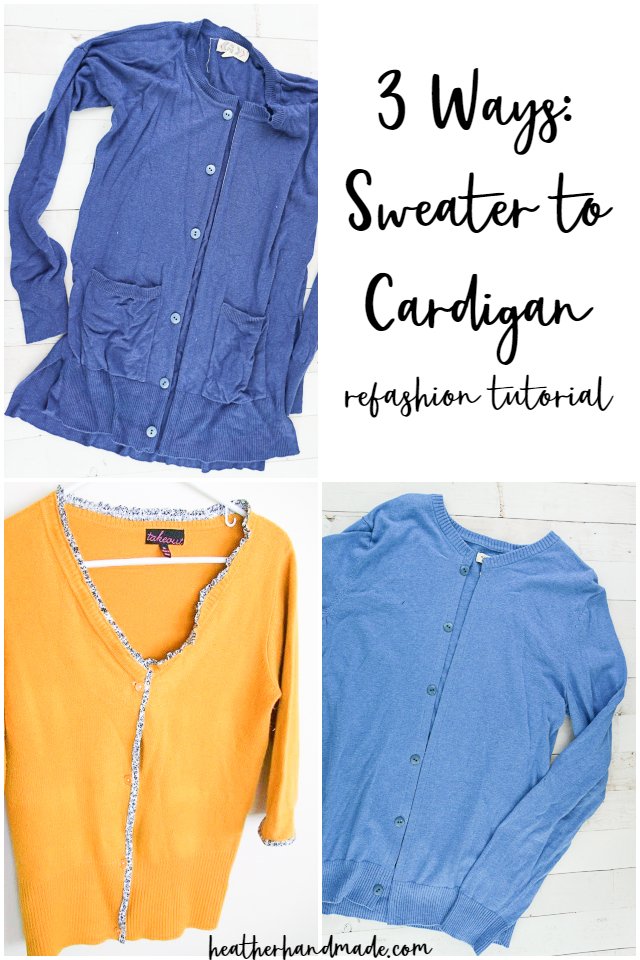
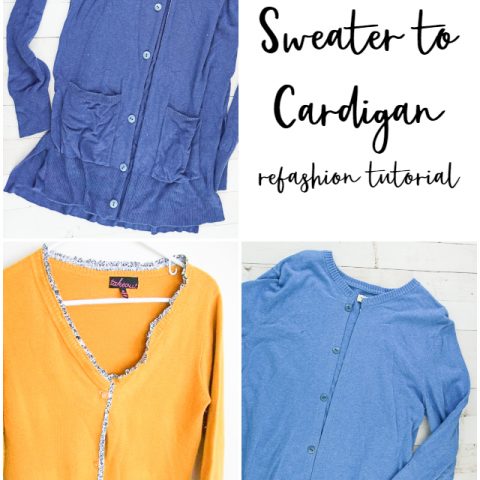
Sweater to Cardigan Refashion Tutorial: 3 Ways

This post may contain affiliate links.
Use one of these three ways to make a sweater to a cardigan refashion. Each tutorial works differently for different sweaters.
If you have to many sweaters and need more cardigans you can turn your sweater to a cardigan with one of these refashion tutorials.
If you get a stain or a hole on the center front of your sweater, or you want to make a sweater a little more fitted; then you can turn it into a cardigan.
It’s also good to know how to fix a hole in a sweater, because it might get ripped! Or If you find a sweater that’s too long, here’s how to shorten a sweater. And don’t miss out on all of these sweater refashions and upcycles!
Sweater to Cardigan Refashion with hem tape
This method of turning a sweater into a cardigan works best with sweaters that a little oversized. It removes a little bit from the center front, so you need extra room to start with.
It works best with a tighter weave and a little bit heavier yarns. You lose about 1 inch at the center front.
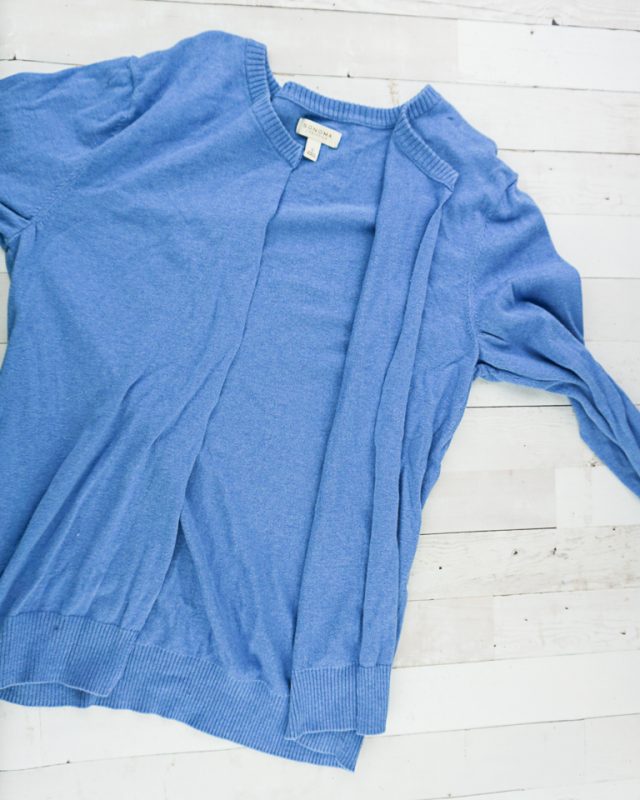
Cut down the center front of the sweater. I followed a knitted line which was tedious, but it gave me a very straight line.
With an iron apply soft stretch hem tape* to the inside of each center front.
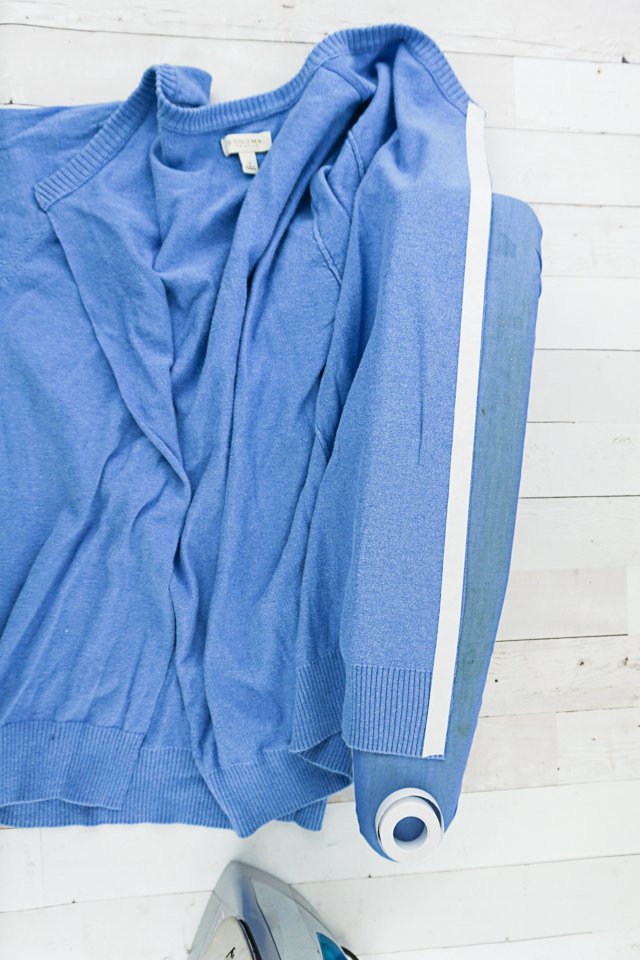
Once it cools peel off the paper backing.
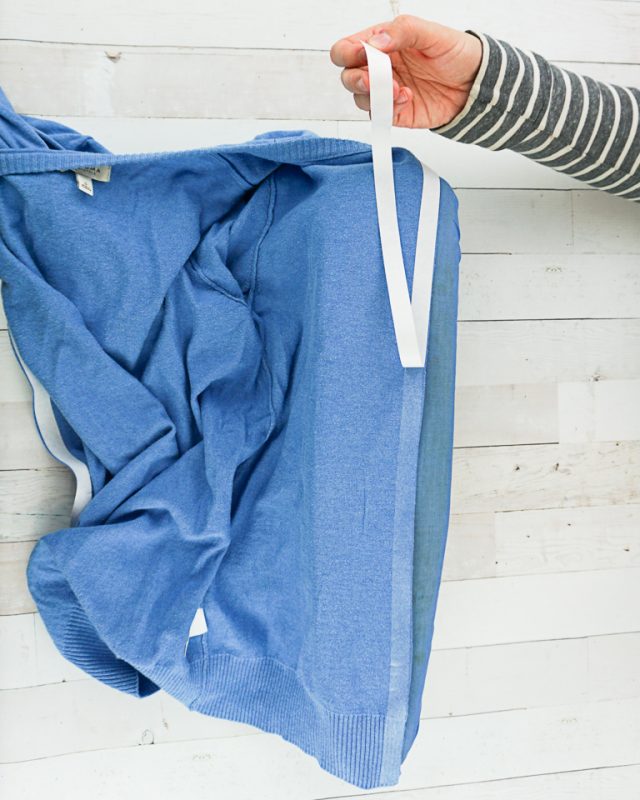
Fold the edge with hem tape over the width of the hem tape and fuse in place with an iron. Do the same to the other side.
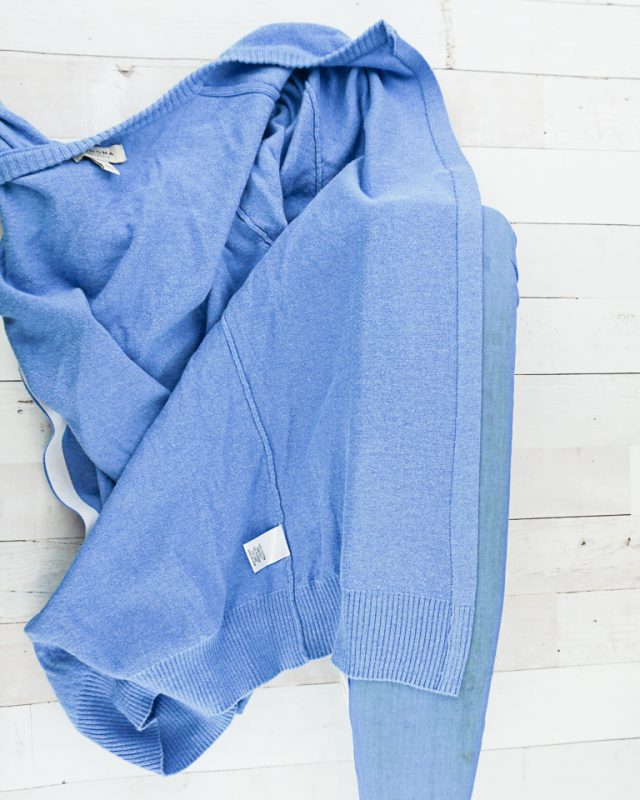
Sew a straight line on each side 1/2 inch from the fold with matching thread. You can leave the sweater like this if you want.
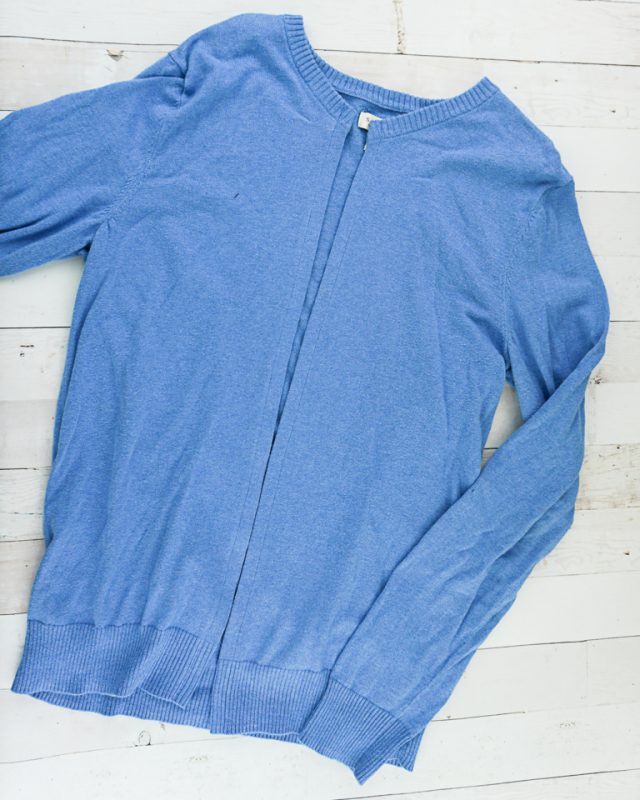
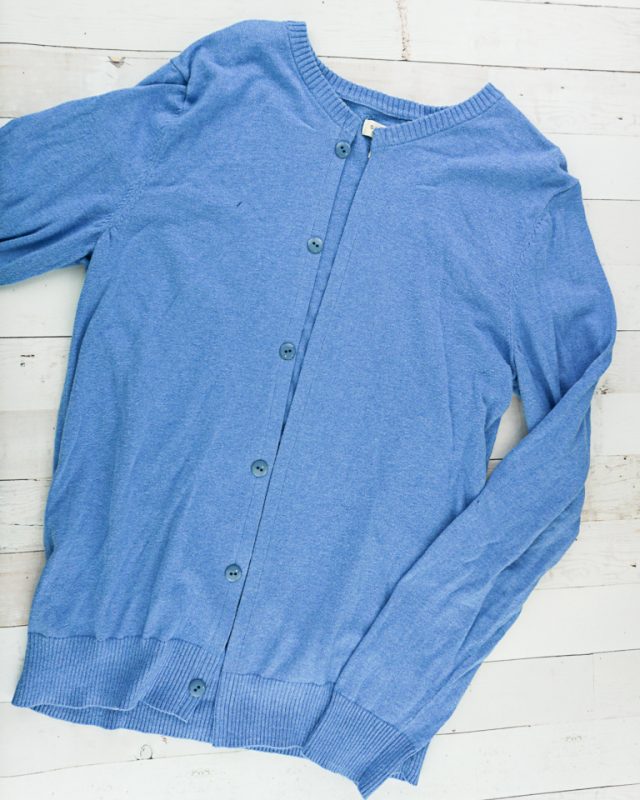
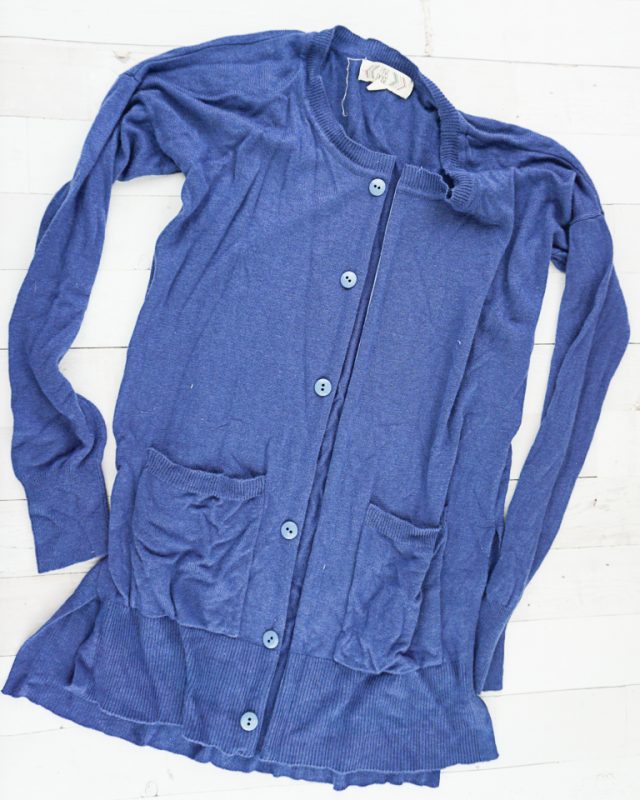
Or you can add buttons and buttonholes for a classic cardigan look.
Sweater to Cardigan Refashion with interfaced knit fabric
This method add interfaced knit fabric to the front of the sweater. You lose about 1/2 inch on the center front. This works best for lighter weight sweaters than need extra stability.
Cut down the center front of the sweater. I followed a knitted line which was tedious, but it gave me a very straight line.

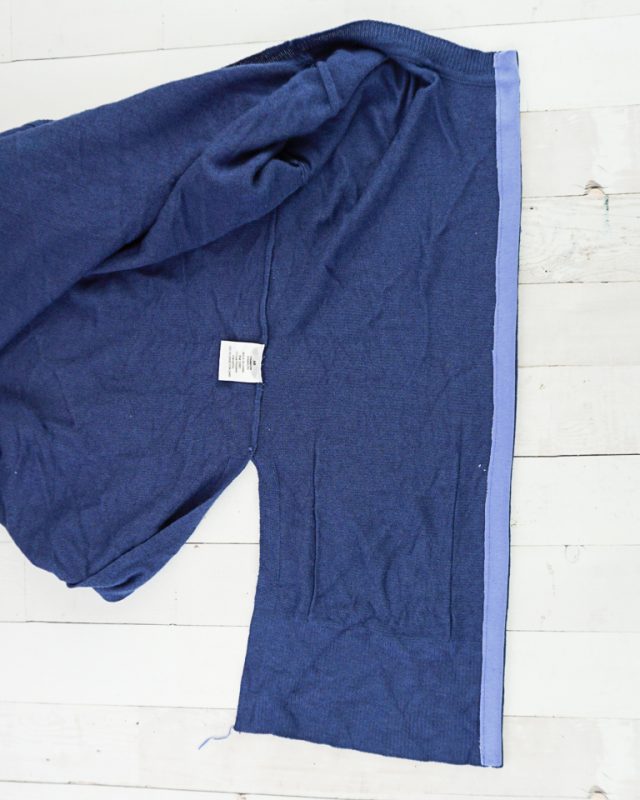
Cut two pieces of lightweight knit fabric 1 inch wide by the length of the center front plus 1/2 inch. The knit fabric will show sometimes so be thoughtful in the color you choose.
Interface both pieces of knit fabric with tricot interfacing*.
Pin each piece of interfaced knit fabric along the center front cut line on the RIGHT side of the cardigan. Fold the two short sides toward the center 1/4 inch.
Sew 1/4 inch from the edge along the center front.
Flip the interfaced knit fabric towards the inside and pin in place. Make sure the top and bottom edges are folded in.
Sew a straight line on each side 1/2 inch from the fold with matching thread.
You can leave the sweater like this if you want.
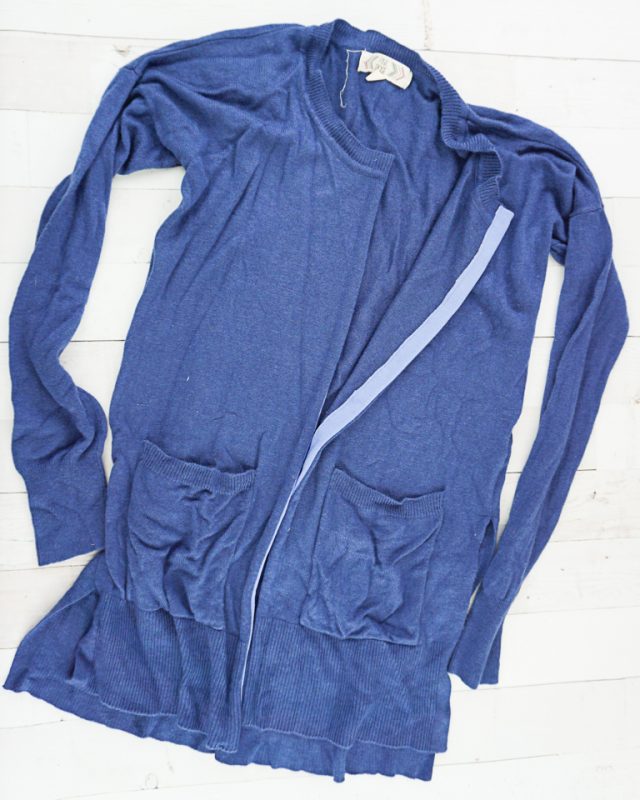
Or you can add buttons and buttonholes.
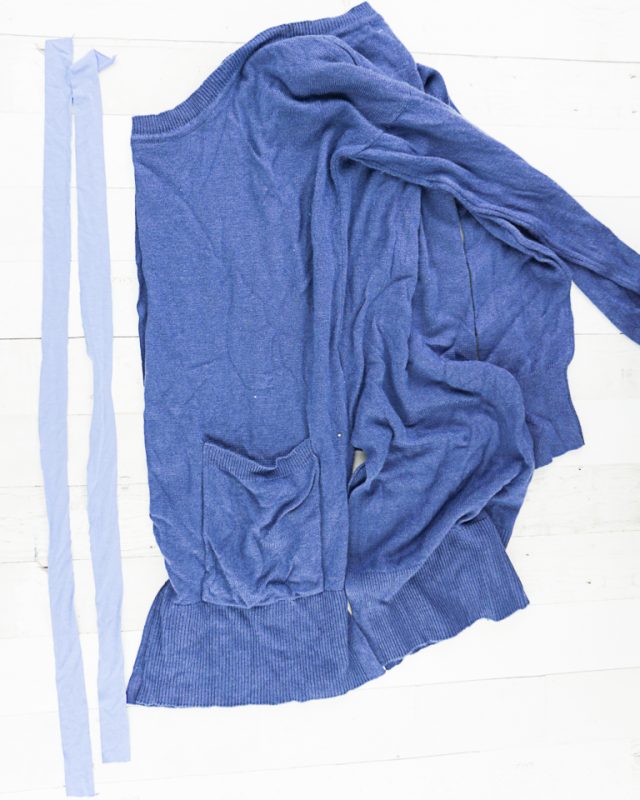
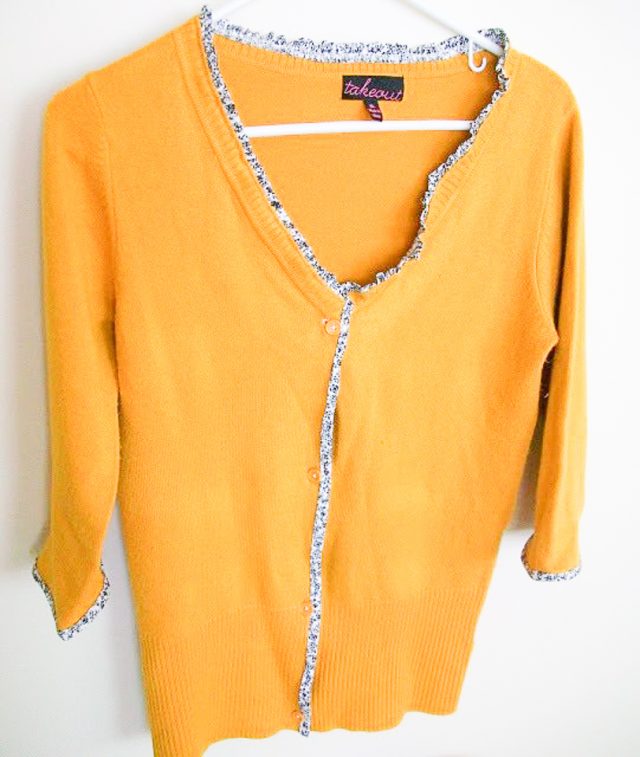
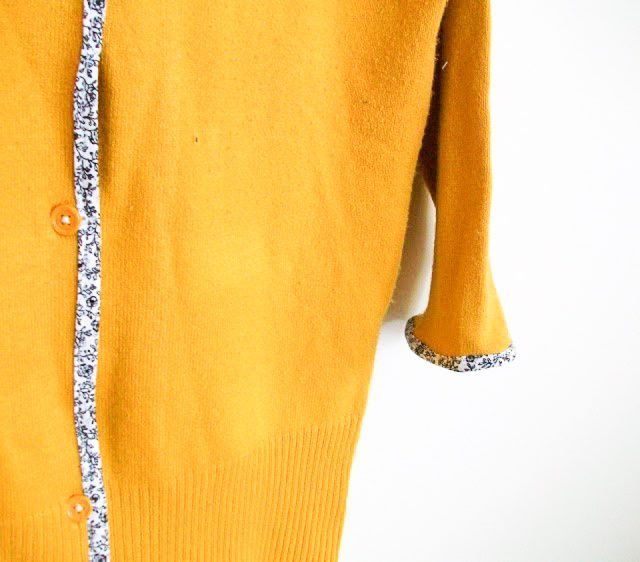
Sweater to Cardigan Refashion with bias tape
This method add interfaced knit fabric to the front of the sweater. You lose about 1/2 inch on the center front. It’s great to use a patterned bias tape for interest. Learn how to make and use bias tape.
I had a great sweater that I had cut the sleeves off to lengthen a coat. After using the sleeves for the coat, I turned it into a cardigan.
Cut straight up the center of the sweater.
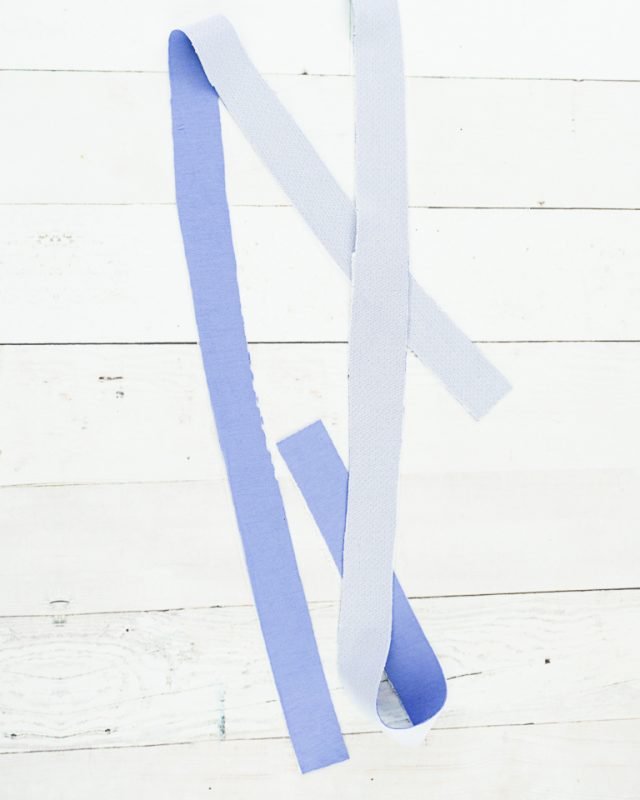
First, cut out strips of fabric on the bias and sew them together. My strips were an inch wide. (I used my own quilting cotton fabric, but you can also buy 1/2 inch double fold bias tape.)
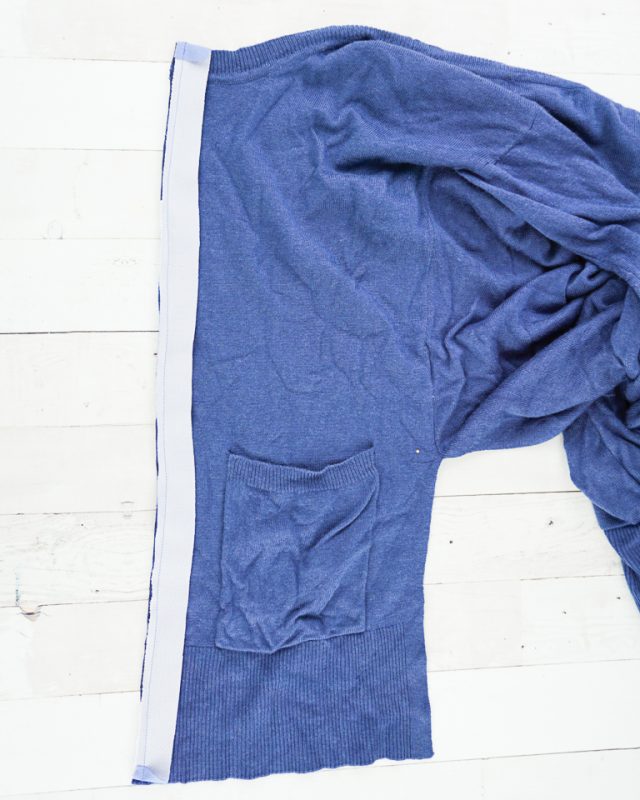
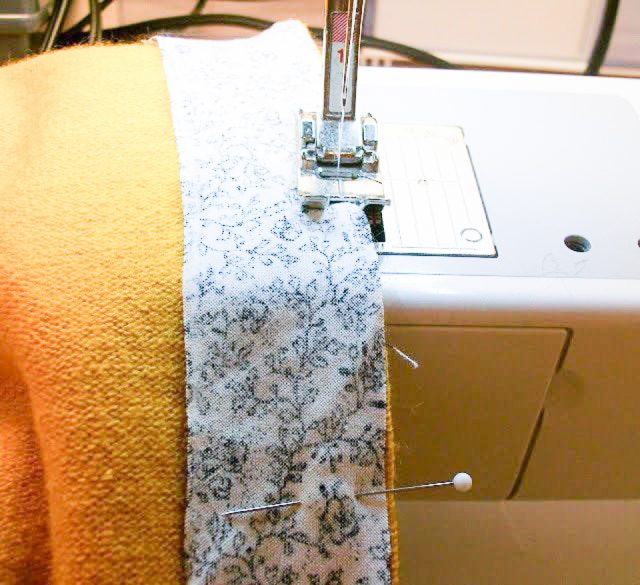
Pin the bias tape to the center front cut line with a 1/2 inch overhang on each side.
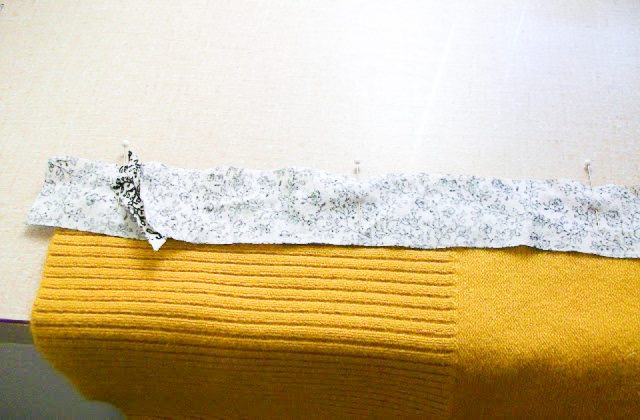
Sew at 1/4″. Be careful not to stretch or pull the sweater as you sew.
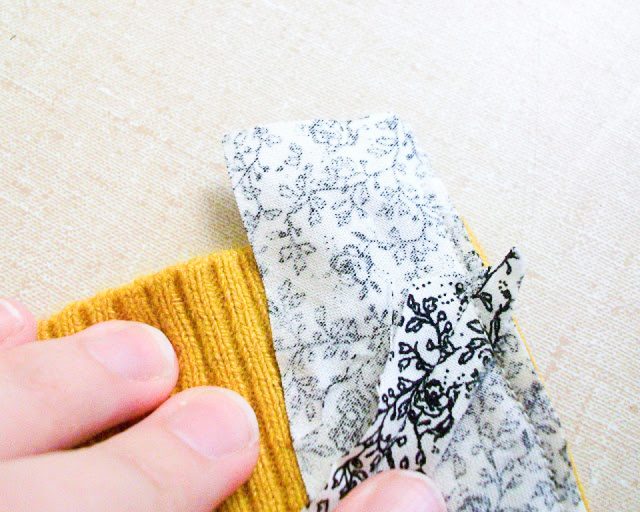
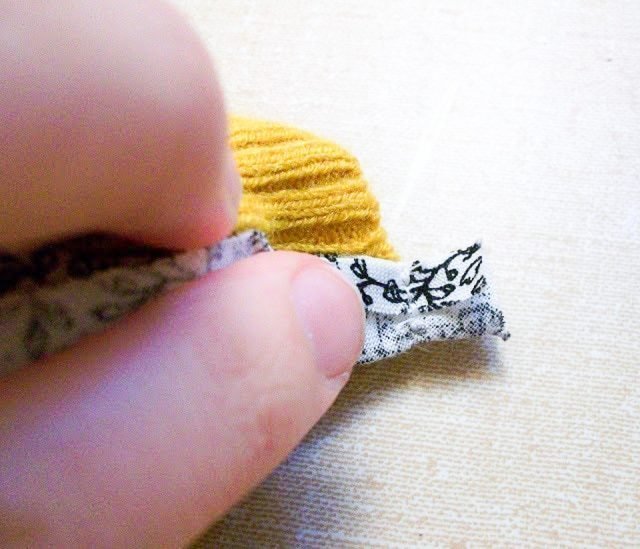
Now to finish the top and bottom, cut the strip so there’s about a 1/2″ seam allowance past the edge.
Then fold the end into an “M” with the right side of the fabric in the middle of the “M”.
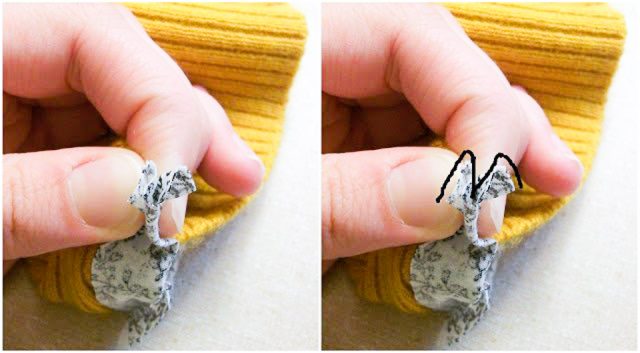
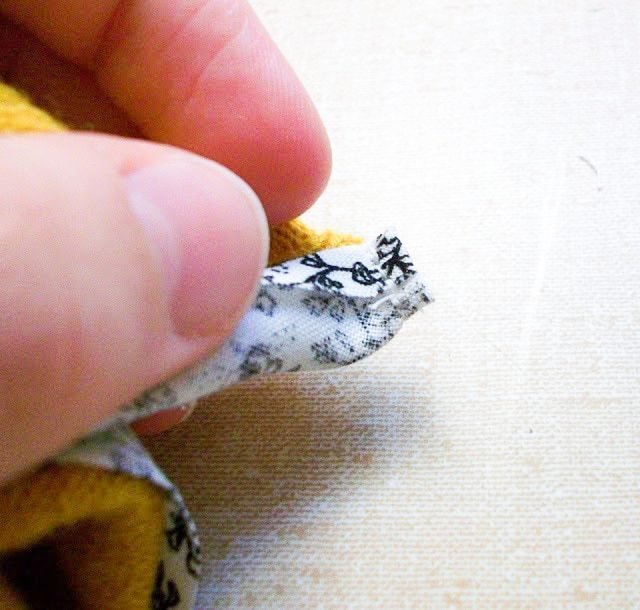
Sew straight across lining your stitch up with the edge of the sweater.
It should look like this.
Trim the edge to an 1/8″.
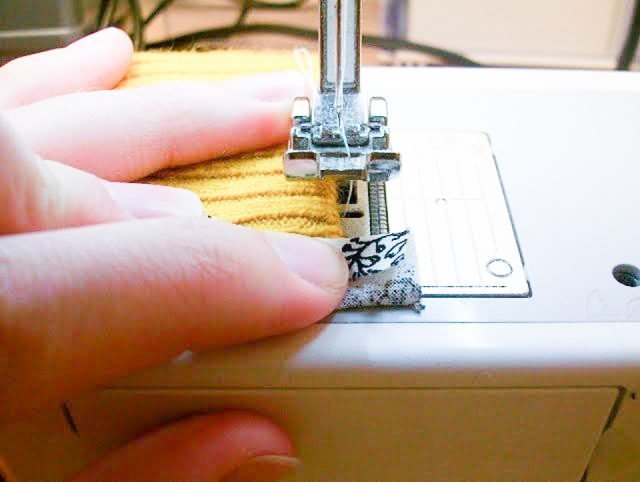
Fold right sides out and you will have a clean seam that lines up with the bottom of the sweater. The edges of the binding will be sewn folded inside.

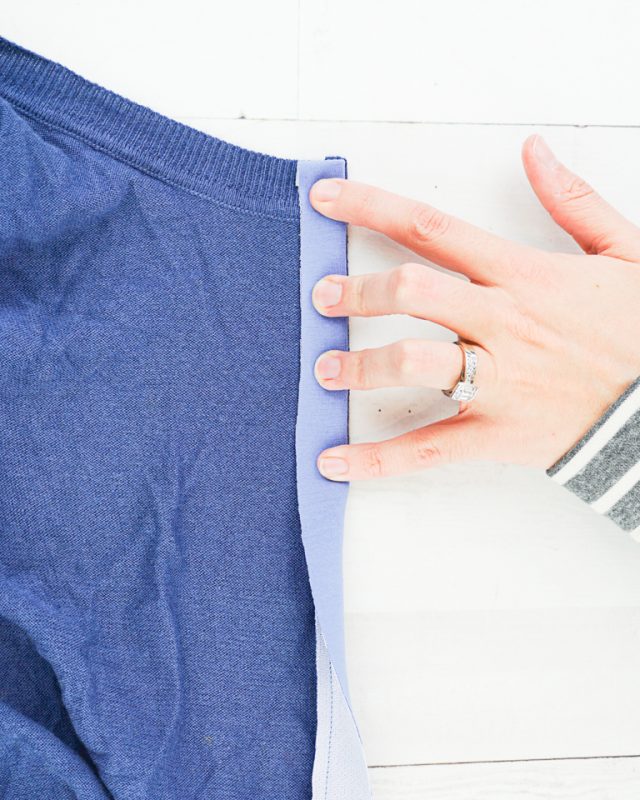
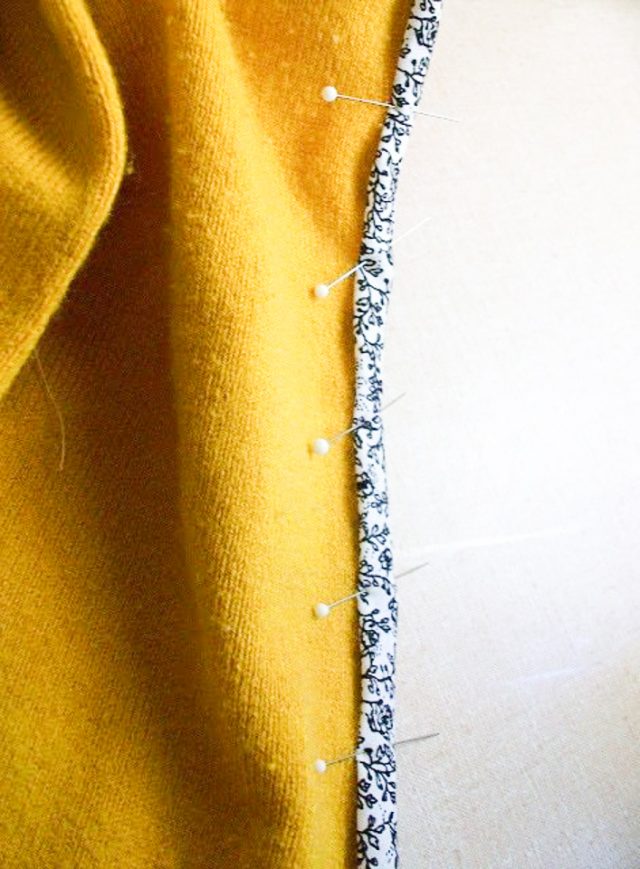
Fold the unsewn edge over at 1/4″ and then pin to the sweater.
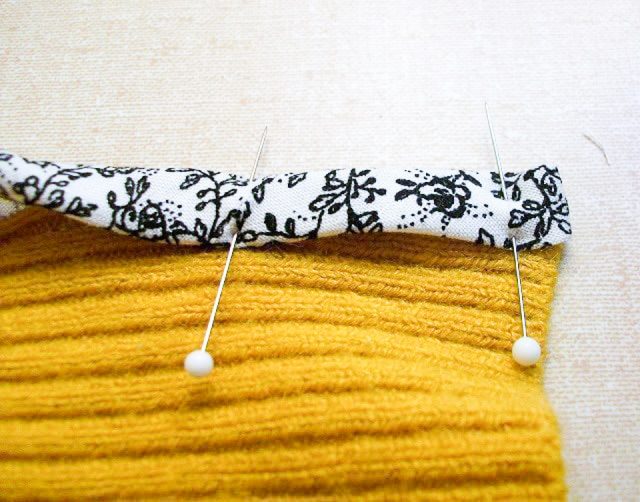
Do this to the whole front edge and then sew the edge down.
Add buttons and buttonholes to the front if you want.
Sweater to Cardigan Refashion
Use one of these three ways to make a sweater to a cardigan refashion. Each tutorial works differently for different sweaters.
Materials
- Sweater
- Hem tape
- Scraps of knit fabric
- Bias binding
- Interfacing
- Matching buttons
- Matching thread
Tools
- Sewing tools
- Sewing machine
Instructions
Sweater to cardigan refashion with hem tape
- This method of turning a sweater into a cardigan works best with sweaters that a little oversized. It removes a little bit from the center front, so you need extra room to start with.
- It works best with a tighter weave and a little bit heavier yarns. You lose about 1 inch at the center front.
- Cut down the center front of the sweater. I followed a knitted line which was tedious, but it gave me a very straight line.
- With an iron apply soft stretch hem tape* to the inside of each center front.
- Once it cools peel off the paper backing.
- Fold the edge with hem tape over the width of the hem tape and fuse in place with an iron. Do the same to the other side.
- Sew a straight line on each side 1/2 inch from the fold with matching thread. You can leave the sweater like this if you want.
- Or you can add buttons and buttonholes for a classic cardigan look.
Sweater to Cardigan Refashion with interfaced knit fabric
- This method add interfaced knit fabric to the front of the sweater. You lose about 1/2 inch on the center front. This works best for lighter weight sweaters than need extra stability.
- Cut down the center front of the sweater. I followed a knitted line which was tedious, but it gave me a very straight line.
- Cut two pieces of lightweight knit fabric 1 inch wide by the length of the center front plus 1/2 inch. The knit fabric will show sometimes so be thoughtful in the color you choose.
- Interface both pieces of knit fabric with tricot interfacing*.
- Pin each piece of interfaced knit fabric along the center front cut line on the RIGHT side of the cardigan. Fold the two short sides toward the center 1/4 inch.
- Sew 1/4 inch from the edge along the center front.
- Flip the interfaced knit fabric towards the inside and pin in place. Make sure the top and bottom edges are folded in.
- Sew a straight line on each side 1/2 inch from the fold with matching thread.
- You can leave the sweater like this if you want.
- Or you can add buttons and buttonholes.
Sweater to Cardigan Refashion with bias Tape
- This method add interfaced knit fabric to the front of the sweater. You lose about 1/2 inch on the center front. It's great to use a patterned bias tape for interest. Learn how to make and use bias tape.
- I had a great sweater that I had cut the sleeves off to lengthen a coat. After using the sleeves for the coat, I turned it into a cardigan.
- Cut straight up the center of the sweater.
- First, cut out strips of fabric on the bias and sew them together. My strips were an inch wide. (I used my own quilting cotton fabric, but you can also buy 1/2 inch double fold bias tape.)
- Pin the bias tape to the center front cut line with a 1/2 inch overhang on each side.
- Sew at 1/4". Be careful not to stretch or pull the sweater as you sew.
- Now to finish the top and bottom, cut the strip so there's about a 1/2" seam allowance past the edge.
- Then fold the end into an "M" with the right side of the fabric in the middle of the "M".
- Sew straight across lining your stitch up with the edge of the sweater.
- Trim the edge to an 1/8".
- Fold right sides out and you will have a clean seam that lines up with the bottom of the sweater. The edges of the binding will be sewn folded inside.
- Fold the unsewn edge over at 1/4" and then pin to the sweater.
- Do this to the whole front edge and then sew the edge down.
- Add buttons and buttonholes to the front if you want.
Recommended Products
As an Amazon Associate and member of other affiliate programs, I earn from qualifying purchases.


If you make something using this sewing project, I’d love to see! Please share it on social media with the hashtag #heatherhandmade and tag me!

I believe small sewing moments can create great joy. Find your own “right” way to sew. -Heather
Can you do the first method with thinner sweaters? Any words of caution with doing that? I would prefer for other fabric to not show as it would in the second method.
I think you could, but I have never tried it. I would be very careful when you are ironing since the fusible hem tape could come through the holes and get on your iron. If you used a press cloth to protect your iron it might work. You’d also have to be extra careful when sewing since the fabric is probably super delicate. I hope that helps!
this is soooo cute and such an awesome idea!!! i love the mustard color too! oh and i have been so super jealous of your bernina! i want one so badly!
I love this cardigan! I may just go refashioning all my sweaters now..
so so cute! i love the fabric that you used with that gold, so classy :]
this is adorable! Question: How does one gather on their serger? (I'm sure its easier shown than told, but I thought I'd ask anyhow…) Do you just push it in harder? or pull a thread or something after you serge it?…