
DIY Upcycled T-Shirt Backpack

This post may contain affiliate links.
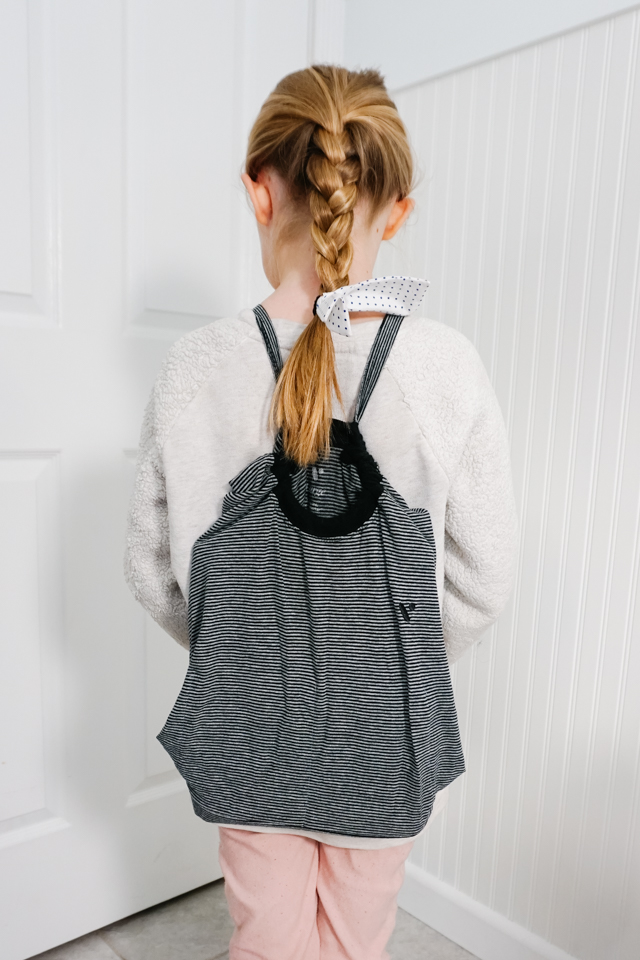
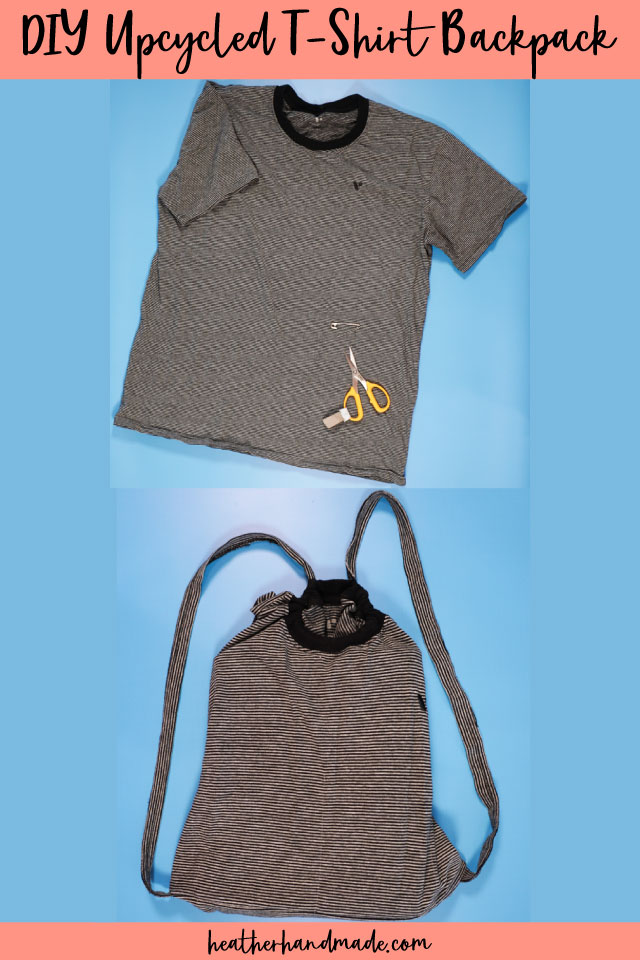
Learn how to upcycle a t-shirt into a backpack. This is a great beginner sewing project to make a simple backpack!
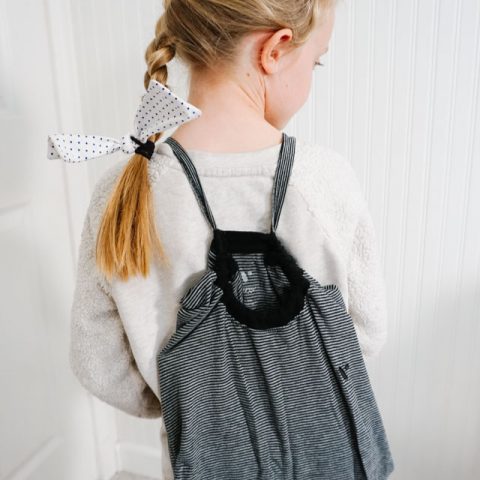
Little kids love backpacks. They love carrying around their special items and feeling so grown up. My son loves feeling like daddy with a backpack or like he’s going off to school like a big kid.
It’s so fun to see them carrying around their toys and books. And here’s a sewing tutorial to make the simplest, easiest backpack ever from an adult tee! Just imagine all the logos you could have on your backpack because you reused a t-shirt!

What is upcycling?
Upcycling is to reuse material to create something better than the original. I usually use this to describe when I’m sewing adult clothing into clothing for children or I’m sewing clothing into an accessory or house item.
Upcycling saves time, saves money, saves the environment, and saves memories.
Save time by reusing details from the original shirt. Save money by using something you already have.
Save the environment by keeping t-shirts out of the landfill. Save memories by reusing a favorite adult t-shirt for your toddler or child.
Now you can make lots of simple backpacks for your kids! Wouldn’t it be a fun birthday party gift?! It only holds lightweight items, but that’s just perfect for kids.
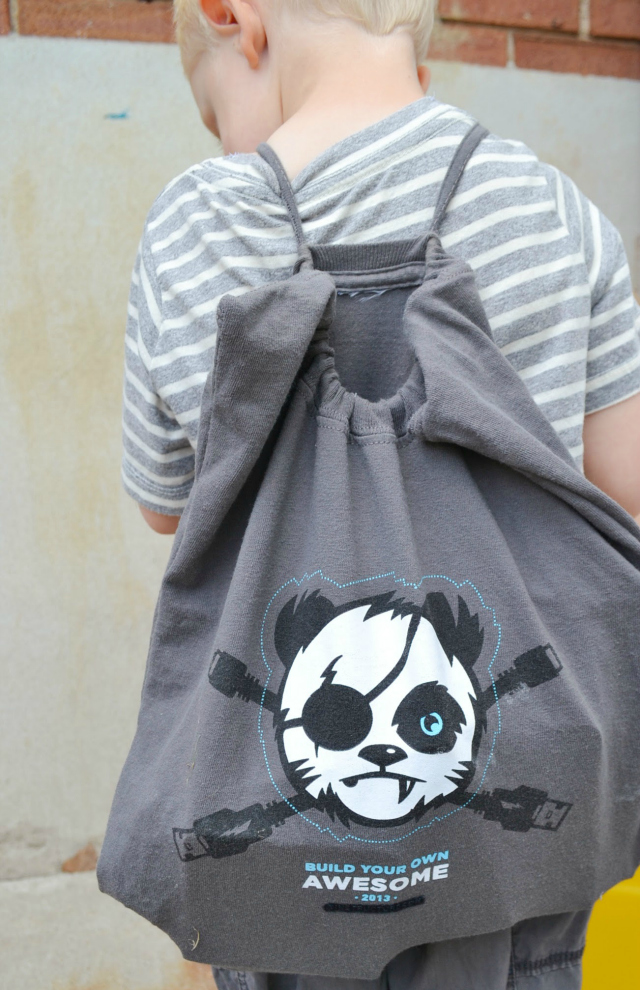
You could use some really fun t-shirts with fun logos. I could see a bunch of superhero shirt backpacks all in a row.
Do you love to sew? Try one of these sewing projects:
- How to Upcycle Clothing for Kids
- T-Shirt Upcycle and Refashion Projects
- Back to School sewing projects
- Sewing projects for kids
- Sewing projects for teens
How to Upcycle a T-shirt into a Backpack
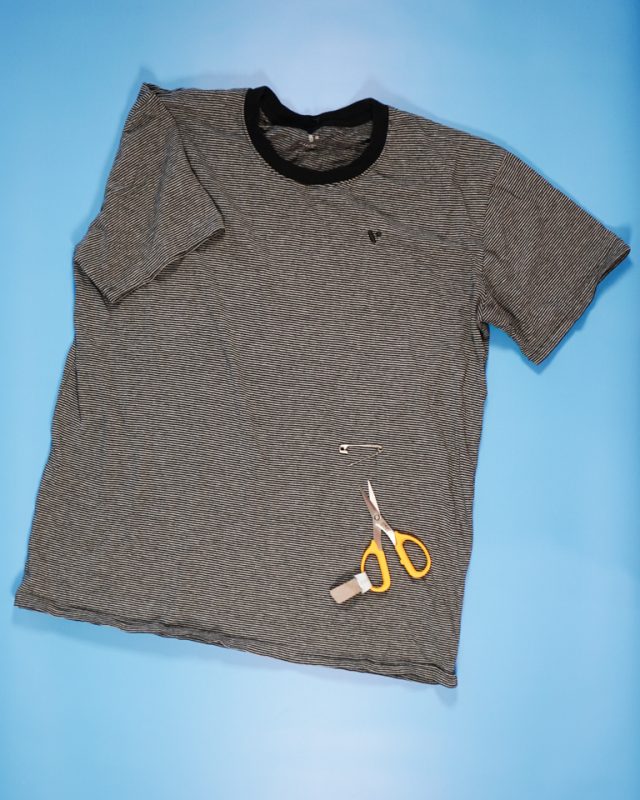
Supplies
- Adult T-shirt
- Sewing supplies
- Sewing machine
Instructions
Cut off the tag if there is one.
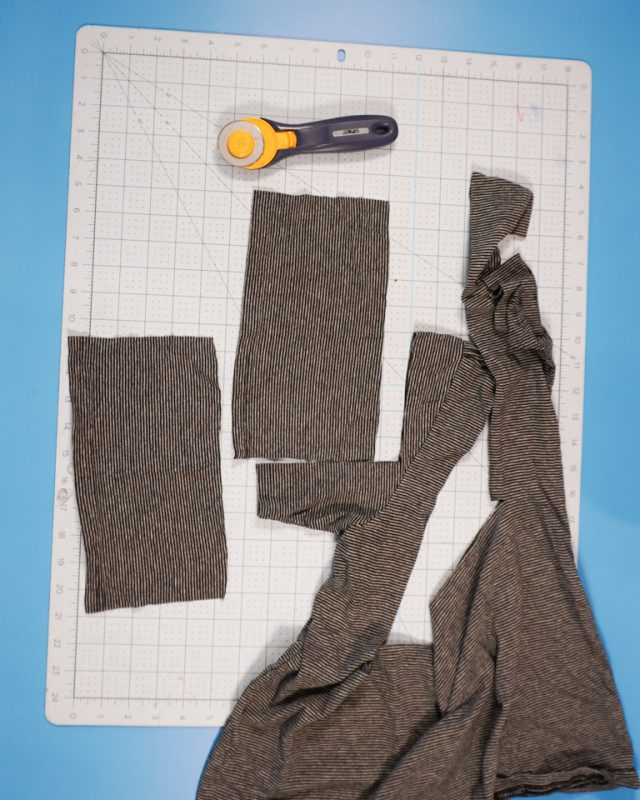
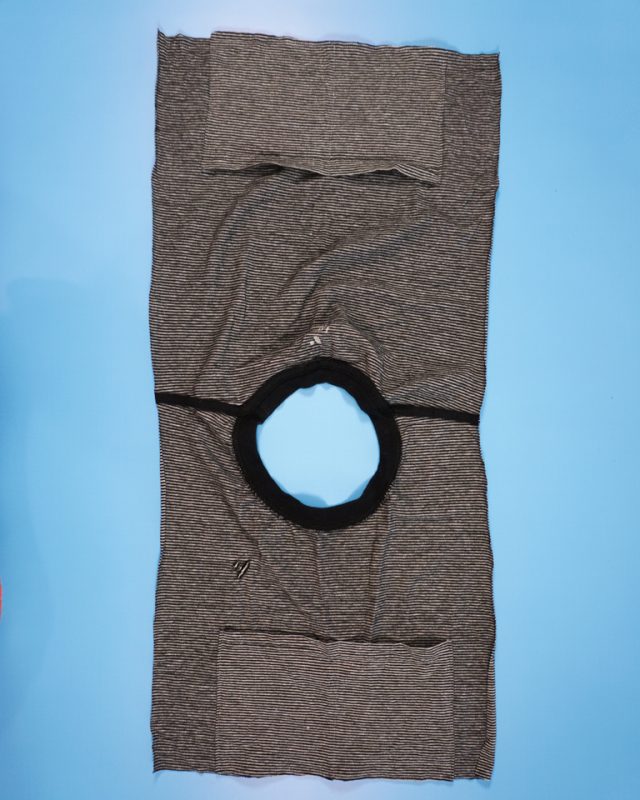
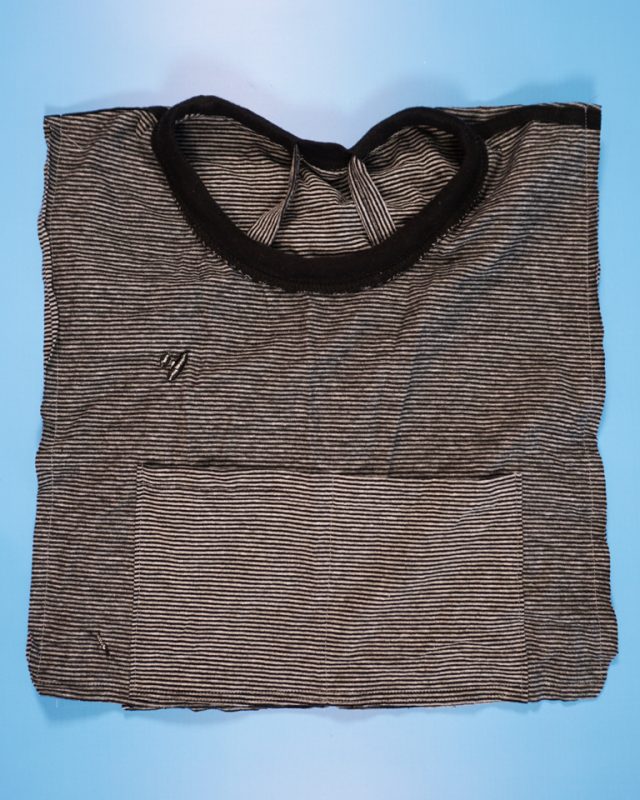
Lay the shirt out flat with the neckband at the top. Cut a rectangle around the neckband and shoulders that is 14 inch by 14 inch leaving the shoulder seams and neckband intact.
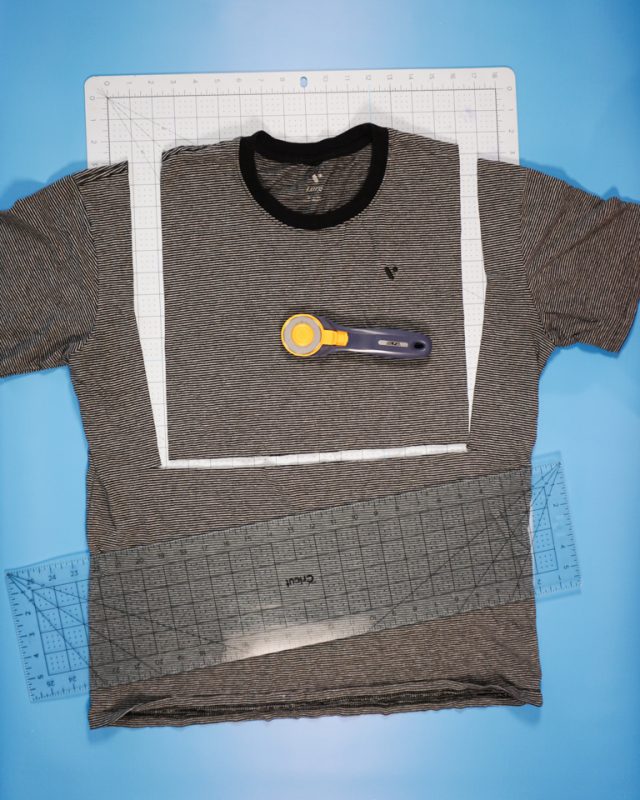
Cut out two long rectangles from the sleeves with one long side reusing the hem.
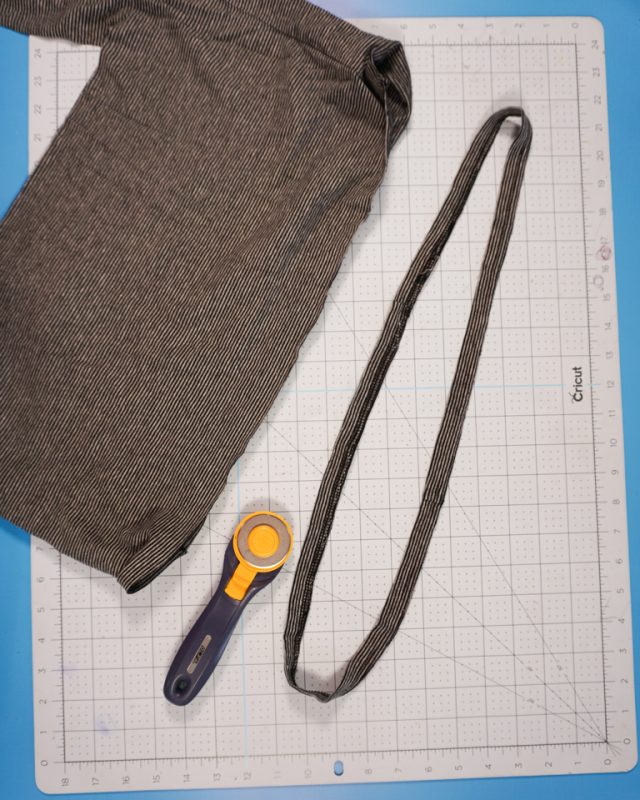
Cut the hem off of the bottom of the shirt. Cut it at a side seam to create one long piece instead of a loop.
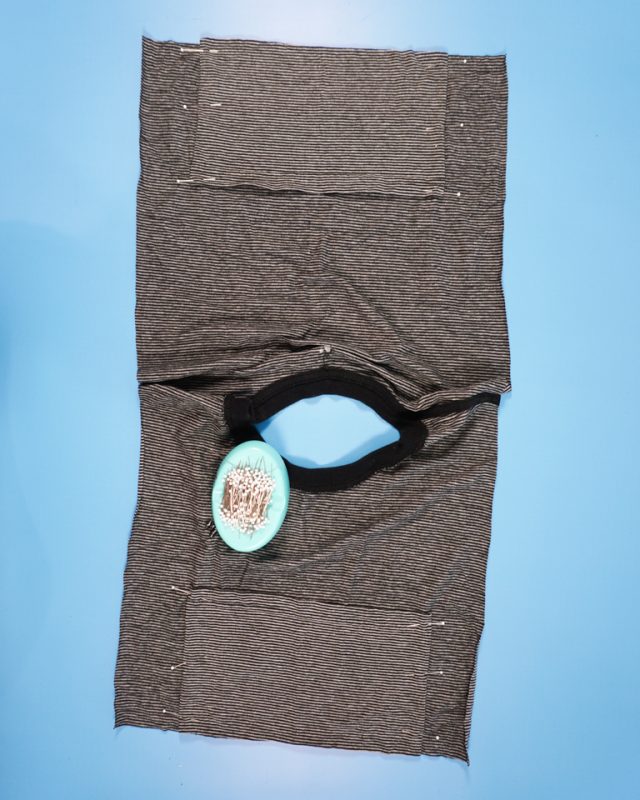
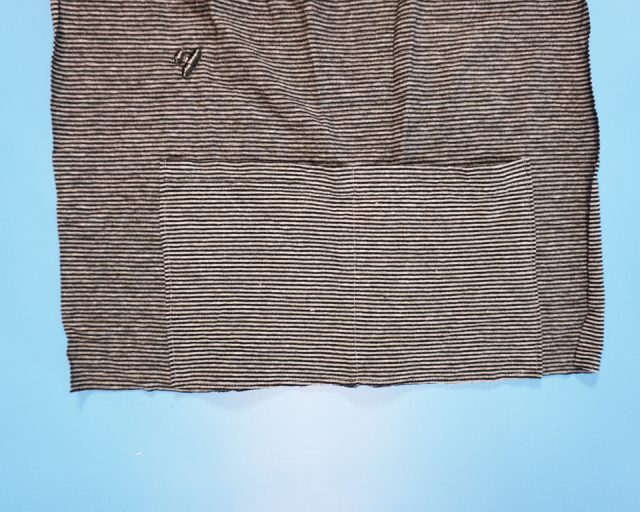
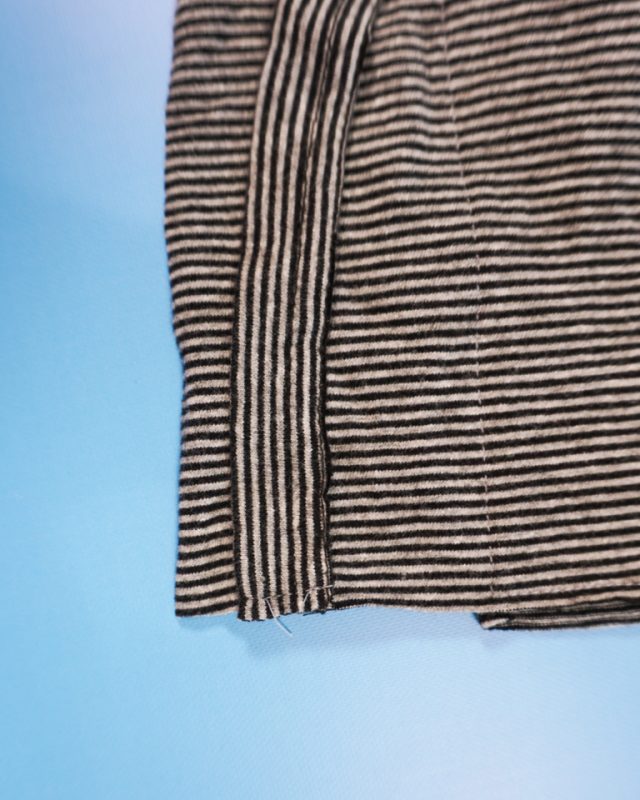
Open the t-shirt so that you are looking at it from the wrong side. Fold the two short ends of the sleeve rectangles under 1/2 inch.
Pin one sleeve rectangle to the short side of the t-shirt. Pin the other sleeve rectangle to the other short side of the t-shirt. The long unhemmed side should line up with the short sides of the t-shirt. The sleeve hem will act as a hem at the top of the pocket.
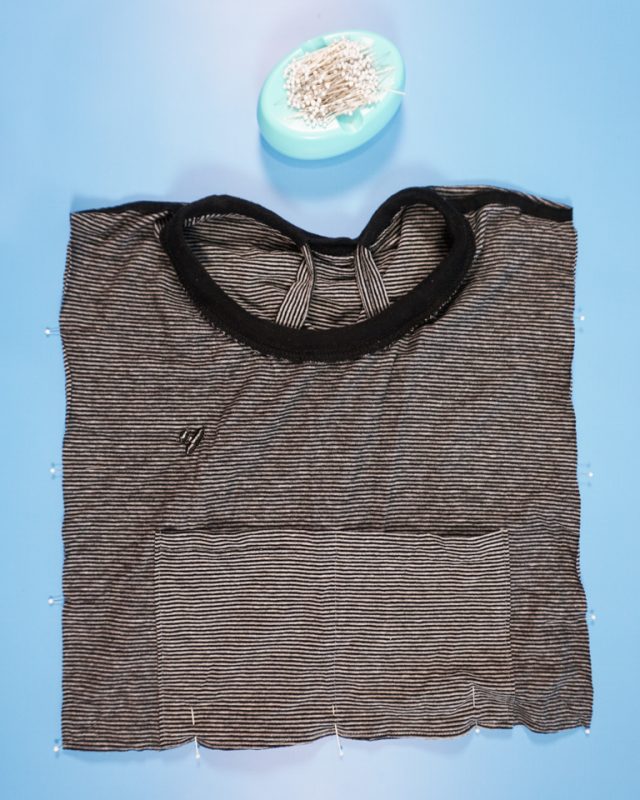
Sew around the pockets starting at a short side, down along the bottom long side, and then back up the other short side. Backstitch when you start and when you stop.
Find the center of the pocket. Sew a stitch down the center of the pocket to create to side by side pockets and backstitch when you start and when you stop.
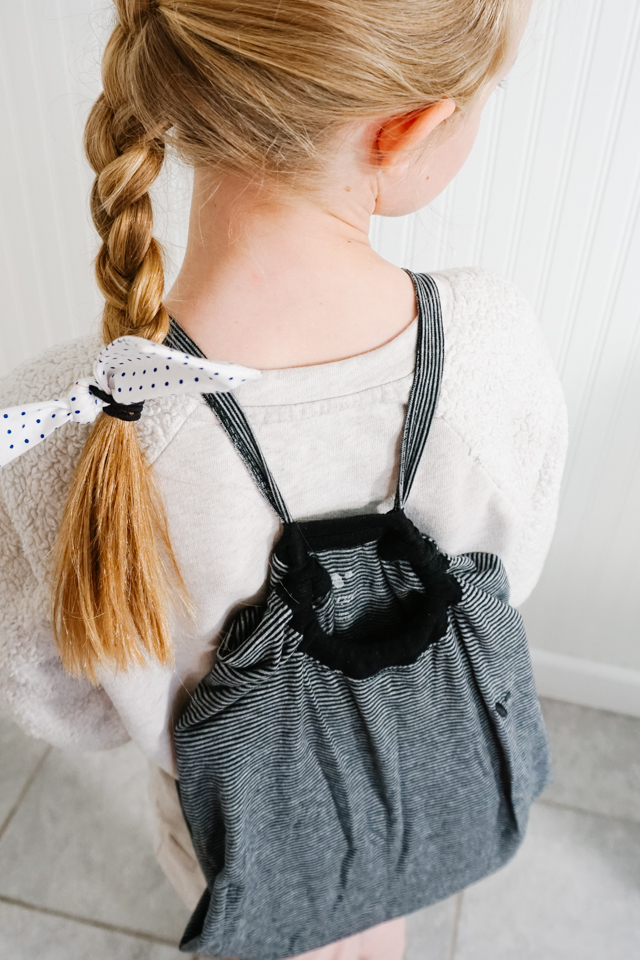
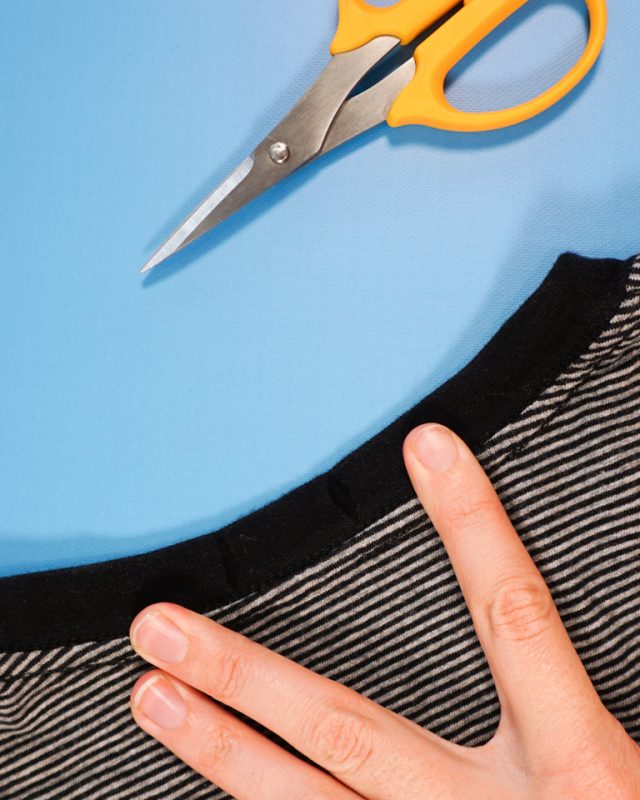
On the center back of the neckband, cut two small slits about 1/2 inch long and 1 inch apart.
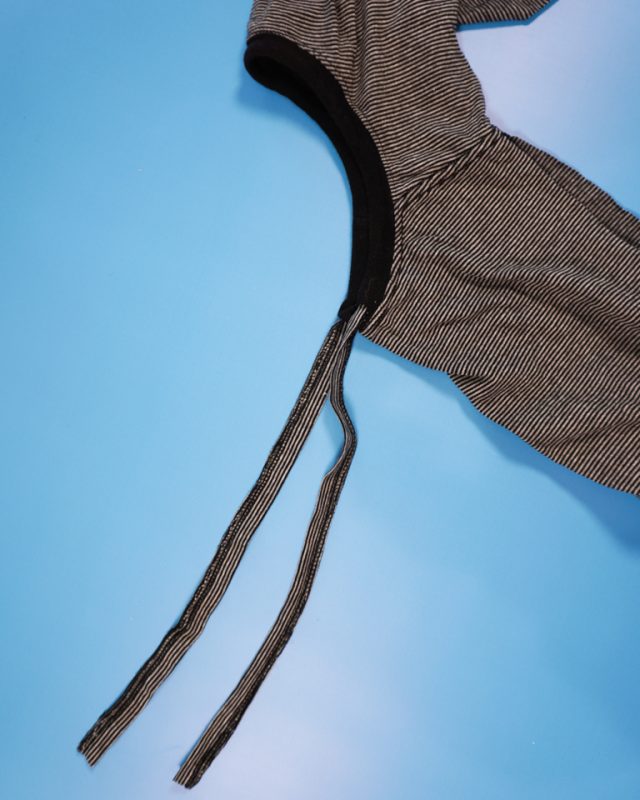
Use a safety pin to thread the hem strap through the slits and around the neckband.
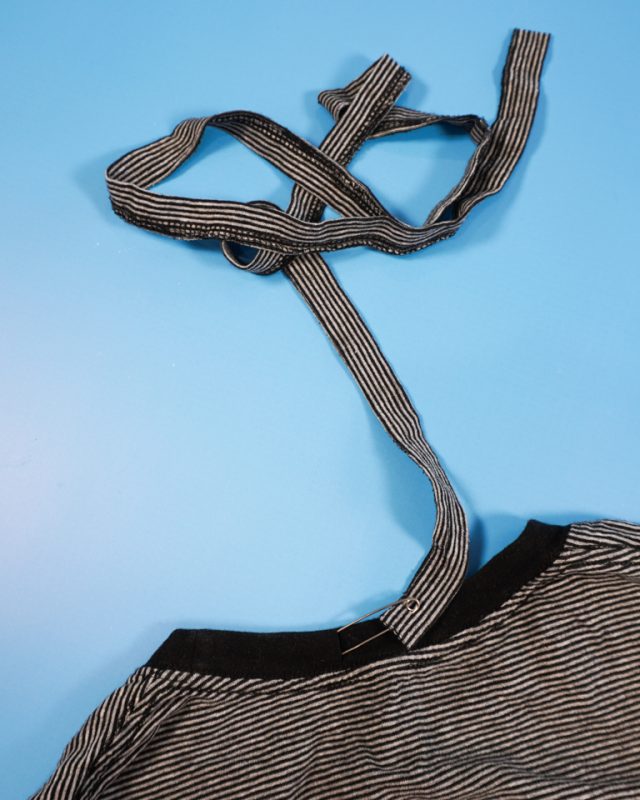
Pull it through so it’s equal on both sides. Tack it in the center front of the neckband to keep it even.
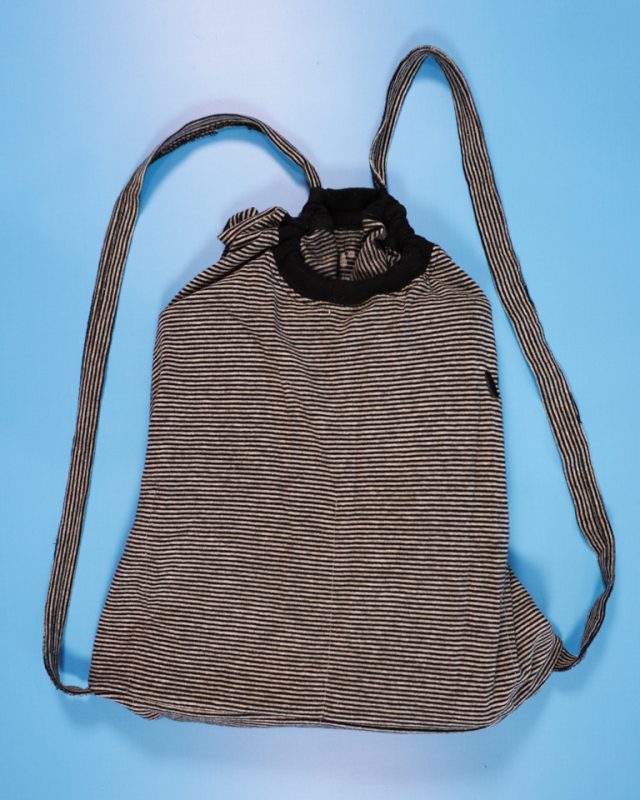
When looking at the right side of the t-shirt rectangle lay out the hem straps down to the bottom of the rectangle. Pin each end 1/2 inch in from each corner. The end of the strap will line up with the bottom of the rectangle.
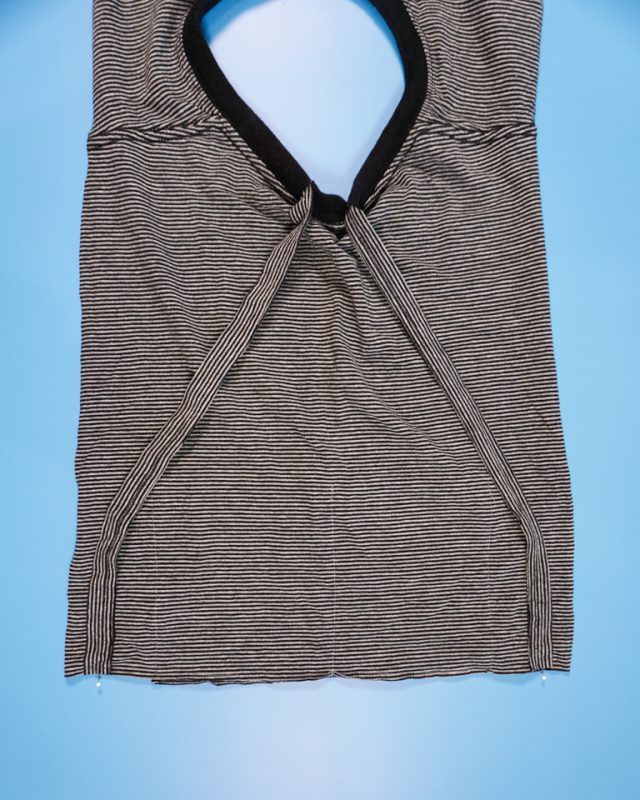
Tack the hem straps in place.
Fold the front of the t-shirt rectangle over and on top of the back of the t-shirt rectangle so that the right sides of the back are facing each other. Pin around the edges.
Sew the three unfinished sides with a 1/2 inch seam allowance. Backstitch when you start and when you stop and pivot at the corners. Trim the corners to reduce bulk.
Turn the backpack inside out.
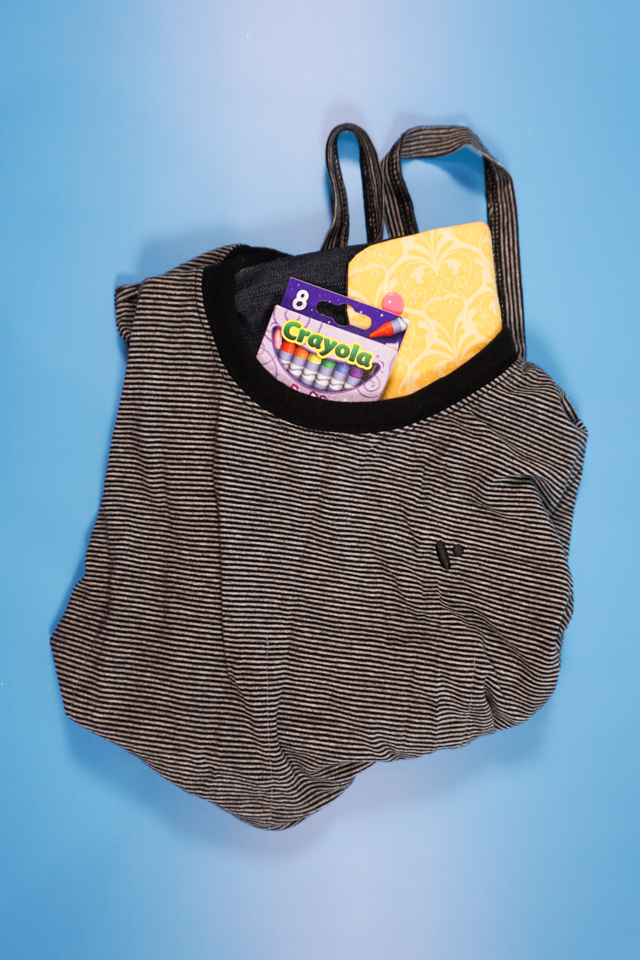
You finished! Fill the backpack with fun, lightweight kid activities!
DIY Upcycled T-Shirt Backpack
Learn how to upcycle a t-shirt into a backpack. This is a great beginner sewing project to make a simple backpack!
Materials
- Adult T-shirt
Tools
- Sewing supplies
- Sewing machine
Instructions
- Cut off the tag if there is one.
- Lay the shirt out flat with the neckband at the top. Cut a rectangle around the neckband and shoulders that is 14 inch by 14 inch leaving the shoulder seams and neckband intact.
- Cut out two long rectangles from the sleeves with one long side reusing the hem.
- Cut the hem off of the bottom of the shirt. Cut it at a side seam to create one long piece instead of a loop.
- Open the t-shirt so that you are looking at it from the wrong side. Fold the two short ends of the sleeve rectangles under 1/2 inch.
- Pin one sleeve rectangle to the short side of the t-shirt. Pin the other sleeve rectangle to the other short side of the t-shirt. The long unhemmed side should line up with the short sides of the t-shirt. The sleeve hem will act as a hem at the top of the pocket.
- Sew around the pockets starting at a short side, down along the bottom long side, and then back up the other short side. Backstitch when you start and when you stop.
- Find the center of the pocket. Sew a stitch down the center of the pocket to create to side by side pockets and backstitch when you start and when you stop.
- On the center back of the neckband, cut two small slits about 1/2 inch long and 1 inch apart.
- Use a safety pin to thread the hem strap through the slits and around the neckband.
- Pull it through so it's equal on both sides. Tack it in the center front of the neckband to keep it even.
- When looking at the right side of the t-shirt rectangle lay out the hem straps down to the bottom of the rectangle. Pin each end 1/2 inch in from each corner. The end of the strap will line up with the bottom of the rectangle.
- Tack the hem straps in place.
- Fold the front of the t-shirt rectangle over and on top of the back of the t-shirt rectangle so that the right sides of the back are facing each other. Pin around the edges.
- Sew the three unfinished sides with a 1/2 inch seam allowance. Backstitch when you start and when you stop and pivot at the corners. Trim the corners to reduce bulk.
- Turn the backpack inside out.
- You finished! Fill the backpack with fun, lightweight kid activities!
Recommended Products
As an Amazon Associate and member of other affiliate programs, I earn from qualifying purchases.


If you make something using this sewing project, I’d love to see! Please share it on social media with the hashtag #heatherhandmade and tag me!

I believe small sewing moments can create great joy. Find your own “right” way to sew. -Heather
I found this idea just at the right moment. I’m working on a memory bear for a family member whose parent passed away. Two t shirts were found for the project….1 sized down for the bear shirt and the other 1 will be made into a smaller backpack using your pattern. Thanks so much for sharing your ideas!
Oh what a sweet sewing project!
So clever! What a fun idea for a birthday party, have all the kids bring their favorite shirt. Or a youth group, for girls camp to carry all your camp books in. So smart!
I love this! Thank you for the great tutorial. I a going to have to make one of these for each of the kiddies for our summer outings!